Master the Art of Self Mehndi Designs: Tips and Tricks for Beginners
Mehndi, also known as henna, is not just a beautiful tradition but also a therapeutic art form. For those who enjoy adding a personal touch to their creativity, “self mehndi designs” are a delightful way to express creativity while perfecting this intricate skill. Whether you’re a beginner or someone looking to level up your mehndi expertise, this guide will walk you through essential tips, techniques, and insights for creating stunning designs on your own hands.
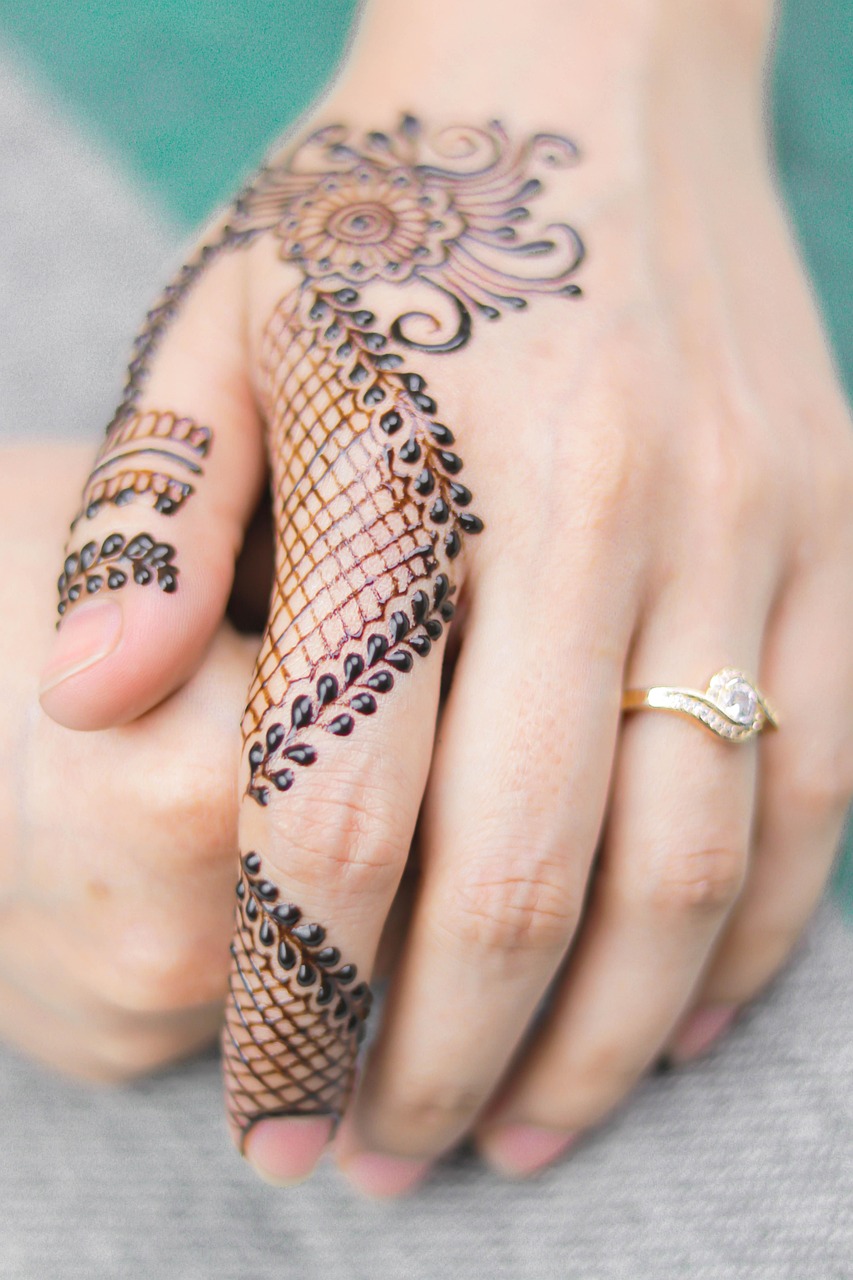
Key Aspect of “Self Mehndi Designs”

Creating your own mehndi designs can seem daunting at first, but with the right approach, it’s an art form anyone can master. “Self mehndi designs” are all about convenience and personalization. With practice, you can create intricate patterns on your own hands for special occasions or even just for fun. Here, we’ll explore the basics to get started.
What are the essential tools for self mehndi designs?
Having the right tools is crucial for creating precise and intricate mehndi designs. Essential items include:
- High-quality mehndi cones.
- Practice sheets to perfect patterns.
- Q-tips or toothpicks for clean-ups.
- Essential oils like eucalyptus to darken the stain.
External Information – Fact or Statistic
Did you know? Using organic henna cones free from harmful chemicals ensures safer and longer-lasting designs. According to Verywell Health, natural henna is far less likely to cause irritations compared to pre-mixed chemical-based variants.
Step-Up with Customization: Another Key Insight
Self mehndi designs give you the freedom to experiment with patterns that reflect your personality. This flexibility lets you explore trending designs or create innovative new ones. With practice, you’ll learn to adapt traditional motifs like paisleys, mandalas, and florals to suit your style.
How can I improve symmetry in my designs?
Achieving symmetry is one of the trickiest parts of self-applying mehndi. Here are effective strategies:
- Start with simple, repeating patterns like dots or lines.
- Use a light pencil to draft your design as a guide.
- Break the design into sections, completing one portion before moving to the next.
External Information – Example or Case Study
An example of a successful self-mehndi artist is @TheMehndiDiary on Instagram, who started with simple patterns on her own hands and now creates intricate masterpieces. Study such accounts for inspiration and techniques.
Practical Tips for Beginners: Additional Useful Insight
Practicing on your own hands not only builds confidence but also allows you to understand how patterns flow on specific areas. Over time, you’ll develop a steadier hand and the ability to create balanced, visually pleasing designs.
How can I ensure my mehndi design lasts longer?
To ensure a deep and long-lasting stain, follow these tips:
- Leave the henna on for at least 6-8 hours or overnight.
- Apply a sugar-lemon mixture periodically to keep the design moist during application.
- Avoid washing the area with water immediately after removing the dried mehndi. Instead, scrape it off gently and let natural oxidation darken the design.
External Information – Expert Tip
According to henna artists at Henna Caravan, the stain’s intensity depends on body heat. Applying heat post-application, such as steaming the hands, can deepen the color naturally.