Basic Mehndi Design Simple: Your Guide to Stunning Henna Art for Beginners
Mehndi, the age-old art of henna design, continues to hold a special place in cultural celebrations and everyday beauty rituals. Are you looking to explore this intricate craft but want to start with something less intimidating? If so, opting for “basic mehndi design simple” is perfect for beginners or anyone who prefers a minimalistic yet beautiful look. In this blog, weâll take you through useful tips, insights, and answers to common questions about mastering simple mehndi designs.
Key Aspect of “Basic Mehndi Design Simple”
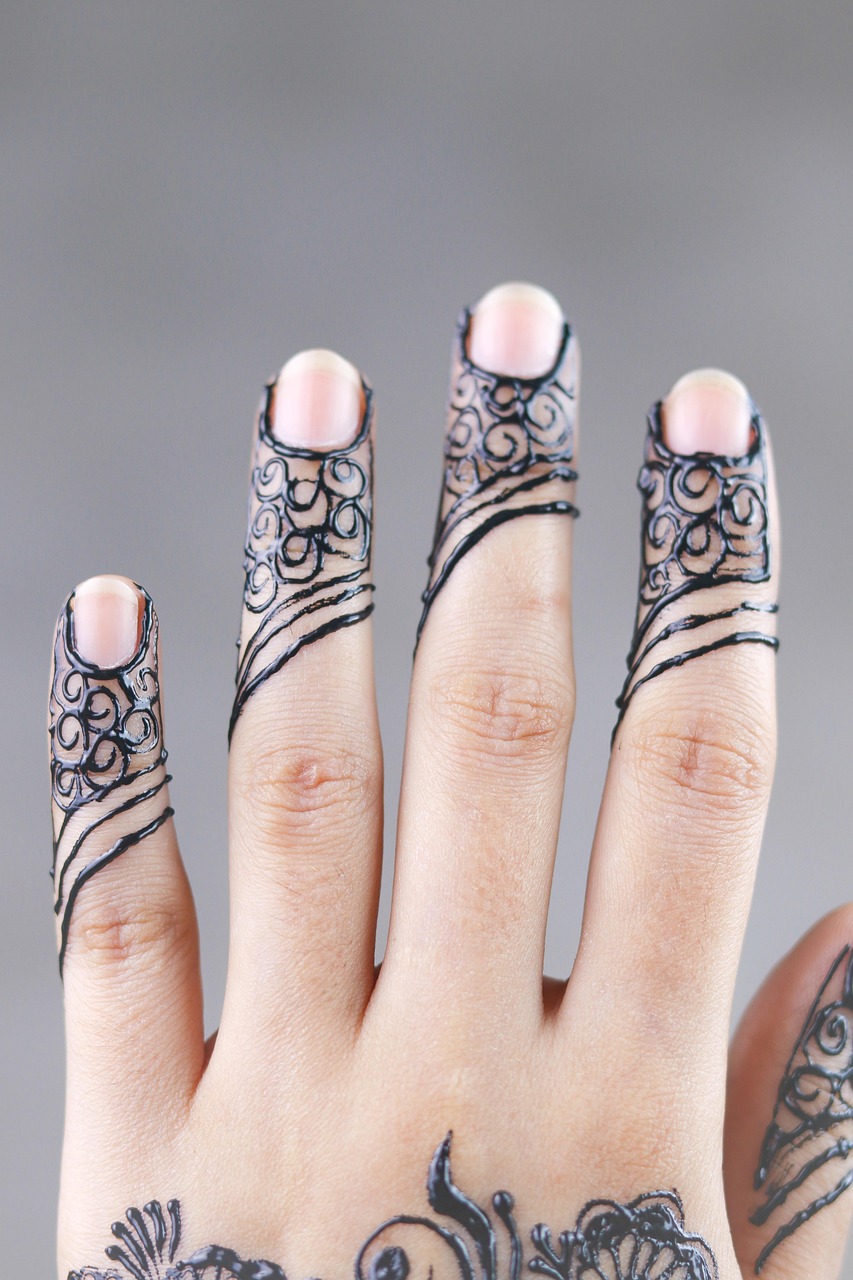
Simple mehndi designs focus on minimalism, making them ideal for beginners or situations where you need a quick yet elegant look. These designs commonly feature easy-to-create patterns such as dots, lines, flowers, and geometric shapes. They donât require advanced artistic skills, which makes them approachable for everyone.
What are the easiest patterns to start with for a simple mehndi design?
For someone just starting out, the easiest patterns include dots and curved lines that create floral motifs, small mandalas, or leafy vines. These timeless patterns are foundational elements in mehndi art and can be layered to create a cohesive, stunning design.
External Information – Fact or Statistic
Did you know that the art of mehndi has been practiced for over 5,000 years across various cultures? According to a study by Henna Caravan, its earliest use was as body art for medicinal cooling, making it practical as well as beautiful.
Getting Creative with “Basic Mehndi Design Simple”
Beyond individual patterns, itâs important to think about composition. A basic design doesnât have to be boring! You can still incorporate creativity by experimenting with symmetrical layouts, spacing, and combining patterns like flowers and vines.
How can I make a simple mehndi design look more polished?
Start by practicing neatness and symmetry. Focus on spacing between patterns to avoid overcrowding. Another great tip is to work on clean curves and steady lines, which will immediately elevate the quality of your mehndi design.
External Information – Example or Case Study
One fantastic example to follow comes from expert mehndi artist @HennaArtist on Instagram. Their simple yet symmetrical designs for beginners receive massive appreciation and make an excellent source of inspiration.
Additional Tips for Achieving Perfect “Basic Mehndi Design Simple”

Once you pick up a cone of henna, practice is key. But donât forget these additional tips to help you perfect your skills and achieve stunning results effortlessly.
How can I prepare the skin for better mehndi results?
Clean the skin thoroughly and ensure it’s free of oil and lotion before applying mehndi. Scrubbing helps to remove dead skin and enhances the color of the stain, making your design look richer and last longer.
External Information – Expert Tip
Famous henna artist Neeta Sharma suggests, “Always let the mehndi dry naturally and avoid blow dryers. Once dried, apply a mixture of lemon juice and sugar to enhance the stain and leave it on for at least 6 hours for best results.”
Conclusion
Creating “basic mehndi design simple” is a beautiful way to celebrate culture, enhance personal style, or even start a new hobby. With easy patterns, thoughtful composition, and a little bit of practice, anyone can master the art of simple yet stunning mehndi. Whether youâre a beginner or simply looking for quick ideas, the key lies in creativity and dedication.
Are you ready to try it out? Share your designs with us or visit our collection of tutorials to get inspired. Donât forget to check out our beginner-friendly mehndi tools and resources to make your journey even easier!